Adding tax to Stripe Checkout
Table of contents
Introduction
This guide walks through the process of integrating Anrok with a new or existing Stripe Checkout flow. If you’re new to the Anrok API, we suggest reviewing the Getting Started guide first.
The guide begins with some initial setup steps that only need to be completed once. We then walk through the steps that will need to be performed each time you create a new Stripe Checkout session with tax calculations.
    sequenceDiagram
    actor U as User
    participant A as App
    participant S as Stripe
    participant K as Anrok
    U->>A: initiate checkout
    A->>U: prompt for address
    U->>A: submit address
    A->>S: create new customer (with address)
    S->>A: respond with customer ID
    A->>K: request tax amount for transaction
    K->>A: respond with tax amount
    A->>S: create checkout session
    S-->>A: webhook: checkout.session.completed
    A->>U: send receipt
Initial setup
This guide uses the Anrok tax as a line item integration approach. Before you begin, email support@anrok.com to update your Stripe integration to tax as a line item, which is not the default approach. This is a required step for this implementation.
Create tax Stripe product
When using Stripe Checkout, tax is provided as an additional line item in the checkout session. We’ll need to create a Stripe product to use when calculating and displaying this tax amount. This only needs to be done once. The same tax product can be used for all Stripe Checkout sessions.
- Navigate to add a product on Stripe
- Fill in the product information with these details:
- Name: Tax
- Pricing model: Standard Pricing
- Price: $0.00
- Frequency: One time
- Click “Save product”
We now have a product ID that we can use for tax when creating a Stripe Checkout session.
To use this product ID for tax with your Anrok Stripe integration, email the product ID to support@anrok.com. This is a required step so we can update your Stripe integration with this product ID.
Create new transaction
To calculate tax and create a Stripe Checkout session, we’ll need a couple pieces of transaction information.
- Customer’s address or Stripe customer ID (for existing customers)
- Stripe product ID(s) and price
Create or retrieve Stripe Customer with Stripe API
If this transaction is for an existing Customer that’s already provided an address, then we can fetch their current address from Stripe using their Stripe Customer ID.
stripe_api_key='sk_xxx'
stripe_customer_id='cus_xxx'

curl https://api.stripe.com/v1/customers/$stripe_customer_id \
  -u $stripe_api_key:
The most relevant address for tax calculation will be the Customer’s shipping address. The billing address can also be used if the shipping address is not available.
{
  "shipping": {
    "address": {
      "city": "New York",
      "country": "US",
      "line1": "East 17th Street",
      "postal_code": "10003",
      "state": "NY"
    }
  }
}
If this Checkout Session is for a new Customer, then we’ll need to collect their address now. Stripe provides an address element that makes this process easier.
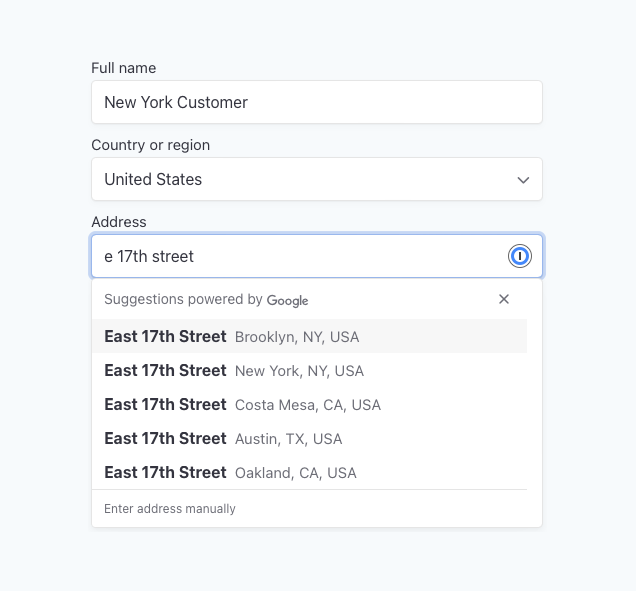
Once the address is collected, we’ll create a new Customer on Stripe so it does not need to be provided a second time in the Stripe Checkout Session.
stripe_api_key='sk_xxx'

curl https://api.stripe.com/v1/customers \
  -u $stripe_api_key: \
  -d 'name'='New York Customer' \
  -d 'shipping[name]'='New York Customer' \
  -d 'shipping[address][line1]'='East 17th Street' \
  -d 'shipping[address][city]'='New York' \
  -d 'shipping[address][state]'='NY' \
  -d 'shipping[address][postal_code]'='10003' \
  -d 'shipping[address][country]'='US'
Calculate tax with Anrok API
Now that we have the customer’s address, we’re ready to calculate tax for this transaction using Anrok’s createEphemeral endpoint. This endpoint accepts transaction details as input and returns the tax amount that needs to be included in the Stripe Checkout session.
anrok_api_key='sxxx/sakxxx/secret.xxx'

curl https://api.anrok.com/v1/seller/transactions/createEphemeral \
    -H "Authorization: Bearer $anrok_api_key" \
    --json '{
        "accountingDate": "2023-01-01",
        "currencyCode": "USD",
        "lineItems": [{
            "productExternalId": "acme-pro",
            "amount": 1050
        }],
        "customerAddress": {
            "line1": "East 17th Street",
            "city": "New York",
            "region": "NY",
            "postalCode": "10003",
            "country": "us",
        }
    }'
If the request is successful, you’ll receive a response similar to the example below. For a complete overview of the response structure and possible error types, refer to the Anrok API documentation.
{
    "taxAmountToCollect":69,
    "lineItems":[{
        "taxAmountToCollect":69
    }]
}
We will use taxAmountToCollect as the tax amount when creating our Stripe Checkout session.
Create Stripe Checkout session with Stripe API
Now that we have both a Stripe tax product and the calculated tax amount, we can create the Stripe Checkout session.
In this example, we’ll create a session with two line items:
line_items[0]: The product/service being purchasedline_items[1]: The tax amount to collect
We’ll also provide the invoice_creation parameter so Stripe generates an invoice for this checkout session. This allows the Anrok Stripe integration to automatically ingest the transaction when it’s finalized.
# Line 1 of the invoice
stripe_product_id='prod_xxx'
stripe_product_amount_in_cents='1050'

# Line 2 of the invoice
stripe_tax_product_id='prod_xxx'
anrok_tax_amount_to_collect='69'

curl https://api.stripe.com/v1/checkout/sessions \
    -u $stripe_api_key: \
    --data-urlencode success_url='https://example.com/success' \
    -d 'customer'=$stripe_customer_id \
    -d 'mode'='payment' \
    -d 'invoice_creation[enabled]'='true' \
    -d 'line_items[0][price_data][product]'=$stripe_product_id \
    -d 'line_items[0][price_data][unit_amount]'=$stripe_product_amount_in_cents \
    -d 'line_items[0][price_data][currency]'='usd' \
    -d 'line_items[0][quantity]'='1' \
    -d 'line_items[1][price_data][product]'="$stripe_tax_product_id" \
    -d 'line_items[1][price_data][unit_amount]'="$anrok_tax_amount_to_collect" \
    -d 'line_items[1][price_data][currency]'='usd' \
    -d 'line_items[1][quantity]'='1'
If we’re generating a Checkout Session for a recurring charge (Stripe Subscription), then the request is slightly different. We no longer need to provide the invoice_creation parameter because Stripe Subscriptions always generate invoices.
# Recurring charge for this subscription
stripe_product_id='prod_xxx'
stripe_product_amount_in_cents='1050'

# Tax amount for the first invoice of this subscription
stripe_tax_product_id='prod_xxx'
anrok_tax_amount_to_collect='69'

curl https://api.stripe.com/v1/checkout/sessions \
    -u $stripe_api_key: \
    --data-urlencode success_url='https://example.com/success' \
    -d 'customer'=$stripe_customer_id \
    -d 'mode'='subscription' \
    -d 'line_items[0][price_data][product]'=$stripe_product_id \
    -d 'line_items[0][price_data][unit_amount]'=$stripe_product_amount_in_cents \
    -d 'line_items[0][price_data][currency]'='usd' \
    -d 'line_items[0][price_data][recurring][interval]'='month' \
    -d 'line_items[0][quantity]'='1' \
    -d 'line_items[1][price_data][product]'=$stripe_tax_product_id \
    -d 'line_items[1][price_data][unit_amount]'=$anrok_tax_amount_to_collect \
    -d 'line_items[1][price_data][currency]'='usd' \
    -d 'line_items[1][quantity]'='1'
View transaction on Anrok
Once the Stripe Checkout session is complete and an invoice generated, the Anrok Stripe integration will automatically ingest the transaction and add it to your Anrok dashboard.
To view the transaction:
- Login to Anrok and navigate to the Transactions page.
- Search by customer or transaction ID to find the transaction.